看到牛腩视频的老师讲解了实体类的生成器,可是可惜的牛腩视频里并没有这集的讲解,所以只能上网去寻找一些资料,看了师姐的博客最后还是完成了这个高效的实体类的生成器。
首先新建一个窗体,在上面脱出我们所需要的一些控件。如图所示:
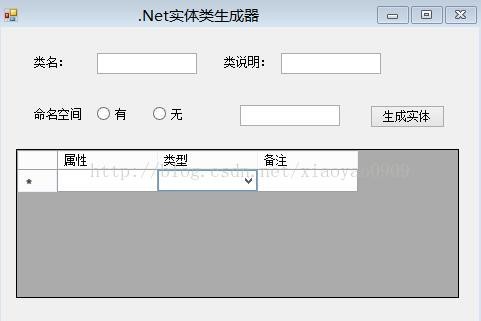
然后就是窗体的代码段了:
using System;
using System.Collections.Generic;
using System.ComponentModel;
using System.Data;
using System.Drawing;
using System.Linq;
using System.Text;
using System.Threading.Tasks;
using System.Windows.Forms;
using System.IO;
using System.Text.RegularExpressions;
namespace DesignEntity
{
public partial class Form1 : Form
{
public Form1()
{
InitializeComponent();
}
private void btnOK_Click(object sender, EventArgs e)
{
string ClassName1 = txtName.Text.Trim();
string ClassExp1 = txtExp.Text.Trim();
string NameSpace1 = txtNameSpace.Text.Trim();
if (ClassName1 .Length ==0)
{
MessageBox.Show("类名不能为空");
return;
}
sfdFile.FileName = ClassName1;
if (sfdFile.ShowDialog ()==DialogResult .OK )
{
FileStream fs = new FileStream(sfdFile.FileName, FileMode.Create, FileAccess.Write);
StreamWriter sw = new StreamWriter(fs, Encoding.Default);
if (radYes.Checked && txtNameSpace.Text.Trim() != null)
{
sw.WriteLine("namespace" + NameSpace1);
sw.WriteLine("{");
}
sw.WriteLine(" public class " + ClassName1);
sw.WriteLine(" {");
foreach (DataGridViewRow Row in fdContent.Rows)
{
if (Row.Cells[0].Value !=null && Row.Cells[0].Value !=null)
{
string propname = Row.Cells[0].Value.ToString();
string type = Row.Cells[1].Value.ToString();
sw.WriteLine(" private " + type + " " + propname + ";");
string propname1 = Regex.Replace(propname, "^_+", "");
string functionName = propname1.Substring(0, 1).ToUpper() + propname1.Substring(1);
sw.WriteLine(" public " + type + " " + functionName);
sw.WriteLine(" {");
sw.WriteLine(" get { return " + propname + "; }");
sw.WriteLine(" set { " + propname + " = value; }");
sw.WriteLine(" }");
}
}
sw.WriteLine("}");
if (radYes .Checked && txtNameSpace .Text.Trim() !=null)
{
sw.WriteLine("}");
}
sw.Close();
fs.Close();
MessageBox.Show("实体类创建成功");
}
}
private void dataGridView1_CellContentClick(object sender, DataGridViewCellEventArgs e)
{
}
private void radYes_CheckedChanged(object sender, EventArgs e)
{
txtNameSpace.Visible = true;
}
private void radNo_CheckedChanged(object sender, EventArgs e)
{
txtNameSpace.Visible = false;
}
}
}
名称和ID的实体类:
using System;
using System.Collections.Generic;
using System.Linq;
using System.Text;
using System.Threading.Tasks;
namespace DesignEntity
{
class Class1
{
private string name;
private int id;
public int ID
{
get { return id; }
set { id = value; }
}
public string Name
{
get { return name; }
set { name = value; }
}
}
}
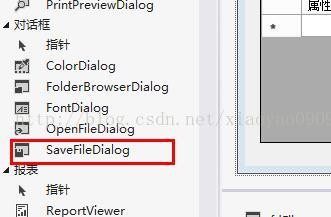
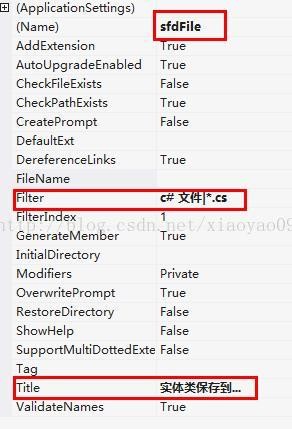
实体类生成后肯定要把它保存到一个自己找到的到的地方,这时候就需要一个新的控件,并对这个控件属性进行相应的设置:
这样一个属于你的实体类生成器就诞生啦!!!!