大金空气净化器使用说明书(中文版)
空气净化器的HEPA滤网使用说明 #生活技巧# #居家生活技巧# #电器维修技巧# #空气净化器使用教程#
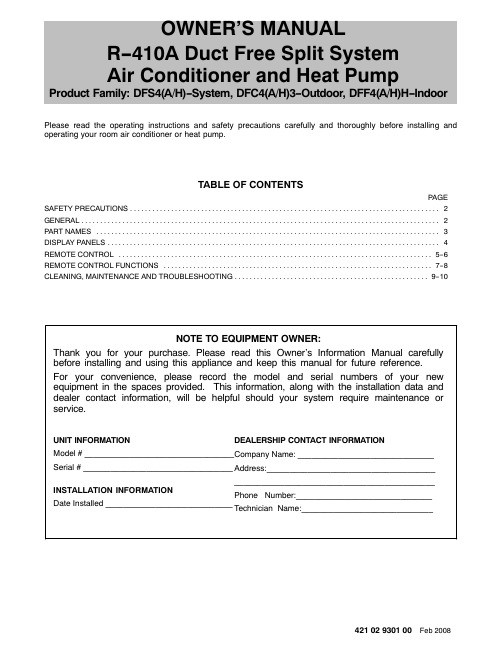
OWNER'S MANUALR-410A Duct Free Split SystemAir Conditioner and Heat PumpProduct Family: DFS4(A/H)-System, DFC4(A/H)3-Outdoor, DFF4(A/H)H-Indoor Please read the operating instructions and safety precautions carefully and thoroughly before installing and operating your room air conditioner or heat pump.TABLE OF CONTENTSPAGE SAFETY PRECAUTIONS2 . . . . . . . . . . . . . . . . . . . . . . . . . . . . . . . . . . . . . . . . . . . . . . . . . . . . . . . . . . . . . . . . . . . . . . . . . . . . . . . . . . . GENERAL2 . . . . . . . . . . . . . . . . . . . . . . . . . . . . . . . . . . . . . . . . . . . . . . . . . . . . . . . . . . . . . . . . . . . . . . . . . . . . . . . . . . . . . . . . . . . . . . . .PART NAMES3 . . . . . . . . . . . . . . . . . . . . . . . . . . . . . . . . . . . . . . . . . . . . . . . . . . . . . . . . . . . . . . . . . . . . . . . . . . . . . . . . . . . . . . . . . . . . DISPLAY PANELS4 . . . . . . . . . . . . . . . . . . . . . . . . . . . . . . . . . . . . . . . . . . . . . . . . . . . . . . . . . . . . . . . . . . . . . . . . . . . . . . . . . . . . . . . . . REMOTE CONTROL5-6 . . . . . . . . . . . . . . . . . . . . . . . . . . . . . . . . . . . . . . . . . . . . . . . . . . . . . . . . . . . . . . . . . . . . . . . . . . . . . . . . . . . . REMOTE CONTROL FUNCTIONS7-8. . . . . . . . . . . . . . . . . . . . . . . . . . . . . . . . . . . . . . . . . . . . . . . . . . . . . . . . . . . . . . . . . . . . . . . . CLEANING, MAINTENANCE AND TROUBLESHOOTING9-10. . . . . . . . . . . . . . . . . . . . . . . . . . . . . . . . . . . . . . . . . . . . . . . . . . . .NOTE TO EQUIPMENT OWNER:Thank you for your purchase. Please read this Owner's Information Manual carefully before installing and using this appliance and keep this manual for future reference.For your convenience, please record the model and serial numbers of your new equipment in the spaces provided. This information, along with the installation data and dealer contact information, will be helpful should your system require maintenance or service.UNIT INFORMATIONModel # _________________________________ Serial # _________________________________INSTALLATION INFORMATIONDate Installed ____________________________DEALERSHIP CONTACT INFORMATIONCompany Name: ______________________________ Address:_________________________________________________________________________________ Phone Number:______________________________ Technician Name:_____________________________421 02 9301 00 Feb 2008SAFETY PRECAUTIONSAny time you see this symbol in manuals, instructions and on the unit, be aware of the potential for personal injury. There are three levels of precaution:DANGER identifies the most serious hazards which will result in severe personal injury or death.WARNING signifies hazards that could result in personal injury or death.CAUTION is used to identify unsafe practices which would result in minor personal injury or product and property damage.NOTE is used to highlight suggestions which will result in enhanced installation, reliability, or operation.GENERALThe high wall fan coil unit provides quiet, maximum comfort. In addition to cooling and/or heating, the high wall fan coil unit matched with an outdoor condensing unit will filter and dehumidify the air in the room to provide maximum comfort. IMPORTANT: The high wall fan coil unit should be installed by authorized personnel only; using approved tubing and accessories. If technical assistance, service or repair is needed, contact the installer or local dealer.The high wall fan coil unit can be set up and operated from the remote control (provided). If the remote is misplaced, the system can be operated from the “Auto” setting on the unit.Operating Modes:The high wall fan coil unit has five operating modes.S Fan onlyS Auto (heat pump models only)S Heating (heat pump models only)S CoolingS Dehumidification (DRY)Fan OnlyIn Fan Only mode, the system filters and circulates room air without changing room air temperature.AutoIn Auto mode, the system will automatically cool or heat the room according to the user-selected set point.HeatingIn Heating mode, the system heats and filters room air. CoolingIn Cooling mode, the system cools, dries and filters room air. Dehumidification (DRY)In Dehumidification mode, the system dries, filters and slightly cools room air temperature. This mode does not take the place of a dehumidifier.Remote ControlThe remote control transmits commands to set up and operate the system. The controller has a window display panel that shows the current system status. The controller can be secured to a surface when used with the mounting rack provided.2 421 02 9301 00421 02 9301 00 3PART NAMESFront panel frame Front panel Air filterHorizontal air flow grille Vertical air flow louver Room temperature sensor Display panelInfrared signal receiver Remote controllerInterconnecting tubing Connective cable Service valveINDOOR Remote controller holder Indoor/Outdoor Unit1245638791011121314MODE Button ON/OFF Button FAN SPEED Button AIR DIRECTION Button SWING Button LED Button RESET Button F/C Button TEMP Button SLEEP Button CLOCK Button TIMER Button CANCEL Button TURBO ButtonRemote Control4 421 02 9301 00UNIT DISPLAY PANELSNOTE: The display panel on the indoor unit will look like one of the following. Some of the functions will appear on either the display panel, remote control, or both.On the Unit:Infrared signal receptorOPE RA T I ON T I ME RP R E -D E FA UTO E C ON 9KT I ME R OPE RA T I ONP R E -D E FInfrared signal receptor12K A UTOA UTOT I ME RT I ME RP R E.-D E F .OPE RA T I ON OPE RA T I ON C ooling O nlyFA N ONLYC ooling/ Hea ting 18K - 24KOPERATION :This indicator flashes once per second after power is on and illuminates when the unit is in operation.TIMER :This indicator illuminates when TIMER is set ON or OFF.PRE.-DEF indicator (heat pump units only):Pre-Def indicator illuminates when the coil is warming up to prevent cold blow or when unit goes into defrost mode.AUTO indicator :When air conditioner is set to AUTO mode, the indicatorilluminates.FAN ONLY indicator:When air conditioner is set to FAN ONL Y mode, this indicator illuminates.NOTE: All the pictures in this manual are fordemonstration purposes only. The actual shape of yourair conditioner may be slightly different, but theoperation instructions are the same.1 TRANSMISSION Indicator Lights when remote control transmits signals to the indoor unit.2 MODE Display Indicates the current operation mode - “AUTO”, “COOL”, “DRY”, “HEAT” (Heat Pump Only), or “FAN”.3 ON/OFF Indicator Symbol appears when unit is turned on by the remote control, and disappears when unit is turned off.4 TEMPERATURE Setting From 62°F(17°C) to 88°F(30°C) will be displayed. If Fan Mode is selected there will be no display.5 CLOCK Display Indicates the current time (0 to 24 hours).6 TIMER Display Indicates the set times for the Timer operation (0 to 24 hours).7 LOCK Display Appears when settings are Locked.8 SLEEP Display Indicates unit is running in Sleep mode.9 FAN SPEED Display Indicates the set fan speed. “Auto” is displayed when unit is running in Auto or Dry mode.NOTE: Symbols shown in this manual are for the purpose of demonstration. During actual operation, only therelevant symbols are displayed.421 02 9301 00 5REMOTE CONTROLIMPORTANT : The remote control can operate the unit from a distance of up to 25 ft. (7.6 m) as long as there are no obstructions. This is one-way communication only (from remote control to fan coil).When the Timer function is used, the remote control should be kept within 25 ft. of the indoor unit.The remote control can perform the following basic functions:S Turn the system ON and OFF S Select operating mode S Adjust room air temperature set point and fan speed SAdjust airflow directionRefer to the Remote Control Function section for detailed description of all the capabilities of the remote control.Battery InstallationTwo AAA 1.5 v alkaline batteries (included) are required for operation of the remote control.To install or replace batteries:1.Slide the back cover off the control to open the battery compartment.2.Insert batteries. Follow the polarity markings inside the battery compartment.3.Replace battery compartment cover.NOTE:1.When replacing batteries, do not use old batteries or a different type battery. This may cause the remote control to malfunction.2.If the remote is not going to be used for several weeks,remove the batteries. Otherwise battery leakage may damage the remotecontroller.3.The average battery life under normal use is about 6months.4.Replace the batteries when there is no audible beep from the indoor unit or if the Transmission Indicator fails to light.Set the Clockremote control as outlined below. The clock panel on the remote control will display the time whether the unit is in use or not.Initial Setting of the ClockAfter batteries are installed in the remote control, the clock panel will display “12:00” and begin to flash.1. TEMP buttonS Press these buttons to set time Y Forward B BackwardS Each time you press the button, the time moves forward or backward by one minute. If you press and hold theTemperature button, the time adjusts in increments of 10minutes.2. CLOCK buttonS When the correct time is selected, press the CLOCK button or release Y B buttons and wait for 3 seconds,the clock time will then stop flashing and the clock starts operating normally.3. Readjusting the CLOCKS Press and hold the CLOCK button for approximately 3seconds, the time on the clock display will start to flash. To set the new time, repeat steps 1 and 2 above.NOTE: The time on the clock must be set before the Auto-Timer function will operate.Clock accuracy is within 15 seconds per day.6 421 02 9301 00REMOTE CONTROL FUNCTIONS Pressing the On/Off ButtonWhen the air conditioner is not in operation, the remote control will display the last set point, mode, and time.S Press the On/Off button to start the unit.- The unit will start in the last operating mode andset point. The ON/OFF indicator will appear.S Press button On/Off to stop the unit.- All indicator lights on the unit will go out, and the remote control will display the set point, mode, and time. NOTE: If the On/Off button is pressed too soon after a stop, the compressor will not start for 3 minutes due to the inherent protection against frequent compressor cycling. The unit will only emit an audible beep when the signals are received correctly.Selecting an Operating ModeUse the Operating Mode button to select one of the available modes.A07548 Setting the Room Temperature Set Point Pressing the increase temperature set point Y and decrease B buttons will raise or lower the temperature. The unit will confirm signal receipt with a beep and the value of the set temperature on the display will change accordingly. The temperature can be set between 62_F (17_C) and 88_F (31_C).NOTE: In Cooling mode, if the temperate selected is higher than the room temperature, the unit will not start. The same applies for the Heating mode if the selected temperature is lower than the room temperature.Selecting the Fan SpeedThe fan speed can be selected by pressing the FAN SPEED button.NOTE: When the unit is on, the fan will run continuously in cooling or heating. When in heating, there might be situations where the fan will slow down or shut off to prevent cold blow.Selecting the Horizontal Direction Louver PositionIn order to optimize comfort, the horizontal louvers can operate in a preset range as shown below.The horizontal louvers can be adjusted using the remote control. The horizontal louvers can be either stationary or moving continuously.Press the AIR DIRECTION button repeatedly to choose one of the louver positions. Every time the Air Direction button is pushed, the louver will swing by 6 degrees.In the Cooling, Dehumidification, and Fan Only mode, the louver will swing in the cooling range. In the Heating mode, the louver will swing in the heating range.NOTE: Always use the remote control to adjust the louver position, otherwise abnormal operation may occur. If the louver is manually adjusted out of its range, turn the unit off and then on again.Auto SwingT o have the louver moving continuously, push the SWING button. Push again to stop the louver.Selecting Vertical Direction of the LouverThe vertical louvers can be adjusted manually to direct the airflow to achieve the optimal comfort in the space.A07543 Timer FunctionTIMER ON (to start the unit) and TIMER OFF (to stop the unit) can be used separately or together.Timer ON onlyThis function will allow the unit to start automatically after a set number of hours. The TIMER ON can be set while the unit is on or off.UNIT ON-Press the TIMER button once. The current time flashes next to the TIMER ON. Press the Temp Y or B button to set the desired “Time On”. Every time the Y or B button is pushed, the time increases or decreases by 10 minutes.- When the TIMER ON is set, the TIMER light on unit illuminates. The unit will shut off and it will start at the set time.UNIT OFF- Set the timer described in the UNIT ON section.- The unit will start at the set time.To cancel Timer setting, press the Cancel button.421 02 9301 00 7Timer OFF onlyThis function will allow the unit to stop automatically after a set number of hours. The timer can be set while the unit is on or while it is off.UNIT ON-Press the TIMER button twice. The current time flashes next to the TIMER OFF. Press the Temp Y or Temp B button to set the desired “Time Off”. Every time the Y or B button is pushed, the time increases or decreases by 10 minutes.-When the TIMER OFF is set, the timer light on the unit illuminates and the unit turns off automatically at the set time.UNIT OFF-Set the TIMER off as described in the UNIT ON section.-The unit will turn on and will turn off at the set time.-If TIMER OFF is canceled (by pushing Cancel button) before the set time elapses, the unit will continue running. Timer ON and Timer OFFUse both functions to program the unit to turn on and shut off at specified times.UNIT OFF-Set TIMER ON as previously described.-Set TIMER OFF as previously described.-The unit will start automatically at the set TIME ON and will turn off at the set TIME OFF.UNIT ON-Set TIME OFF as previously described.-Set TIME ON as previously described.-The unit will turn off automatically at the set TIME OFF and will turn on at the set TIME ON.Sleep ModeThis mode is used to conserve energy and can be used when the unit is in the COOL, HEAT or AUTO mode only. Cool Mode-Push the SLEEP button. The SLEEP display will appear.-After 1 hour the set point will be raised by 1.8_F (1_C).-After another hour, the set point will be raised by another 1.8_F (1_C) and the fan will run in low speed.-The unit will shut off 7 hours after setting the SLEEP mode.-The SL EEP mode will be cancelled if any button on the remote control is pressed.Heat Mode-Same as cooling mode but set points will be lowered by 1.8_F (1_C).Turbo ModeThis function is available in COOL mode on 9k and 12k cooling only units. Use the TURBO mode to cool the room rapidly.-Press the TURBO button. An audible “beep” will be heard. -The fan will run on high speed.-The TURBO mode terminates automatically 20 minutes after pushing the TURBO button. It can also be terminated by pushing the TURBO button again. When the TURBO mode is terminated, the unit will go back to original settings.LockLockUse this function to lock the settings on the remote control and to prevent the settings being changed.To Lock and Unlock the remote control, press and hold the Y and B (Temp buttons) at the same time for approximately 3 seconds.Resetting the Remote ControlIf the remote control is not functioning properly, it can be reset by pressing the reset button with a paper clip or tip of a pen. Current settings will be cancelled and the controller will return to the initial settings and will be in standby mode. Push the ON/OFF button to activate it.Time DelayIf the On/Off button is pressed too soon after a stop, the compressor will not start for 3 minutes due to the inherent protection against frequent compressor cycling. The unit will only emit an audible beep when the signals are received correctly.Heating FeaturesIf the unit is in the heating mode, there will be a delay when the fan starts. The fan will start only after the coil is warmed up to prevent cold blow.Defrost OperationIn heating mode, if the outdoor coil is frosted, the indoor fan and outdoor fan will turn off while system removes the frost on the outdoor coil.The system will automatically revert to normal operation when frost is removed from the outdoor unit.Auto StartIf the power fails while the unit is operating, the unit stores the operating condition, and it will start operation automatically under those conditions when the power is restored.8 421 02 9301 00421 02 9301 00 9CLEANING, MAINTENANCE, AND TROUBLESHOOTINGPeriodic MaintenancePeriodic maintenance is recommended to ensure properoperation of the unit. Recommended maintenance intervals may vary depending on the installation environment, e.g.,dusty zones, etc. Refer to Table 1.Cleaning the CoilClean the coil at the beginning of each cooling season, or when necessary. Use a vacuum cleaner or a long-bristle brush to avoid damage to the coil fins.Air FiltersRemove and clean the air filters once a month.NOTE: If air filters show signs of excessive wear or are torn,they must be replaced. Contact your local dealer for replacement filters.1.Open front panel on unit.2.Pull filters down to remove.3.Vacuum filters.4.Clean with warm water.5.Shake filter to remove excess water and dry thoroughly.6.Replace filter by sliding filter behind front grille until filter snaps in place.7.Close front panel on unit.Indoor Unit Front PanelTo clean the front panel on the indoor unit, wipe the outside with a soft, dry cloth. If necessary, a mild liquid detergent can be applied and wiped off with a dry cloth.Preparing for Extended Shutdown PeriodClean the filters and reposition them in the unit. Operate the unit in Fan only mode for 12 hours to dry all internal parts.Turn main power supply off and remove batteries from the remote control.System Operation RecommendationsThe items outlined in the following list will help to assure proper system operation:S Replace both remote control batteries at the same time.S Point the remote control toward the unit display panel when transmitting a command.S Keep doors and windows closed while unit is operating.S Contact an authorized service representative if a problem arises that cannot be easily resolved.S Do not perform cleaning or maintenance activities while unit is on.S Keep display panel on unit away from direct sunlight and heat as this may interfere with remote control transmissions.S Do not block air intakes and outlets on the indoor or outdoor units.Energy Saving RecommendationsThe following recommendations will add greater efficiency to the ductfree system:S Select a comfortable thermostat setting and leave it at chosen setting. Avoid continually raising and lowering the setting.S Keep unit filter clean. Frequent cleaning may be necessary depending on indoor air quality.S Use drapes, curtains or shades to keep direct sunlight from heating room on very hot days.S Do not obstruct air intake on front panel.S Turn on air conditioning before indoor air becomes too uncomfortable.TroubleshootingRefer to Table 2 before contacting your local dealer.10 421 02 9301 00Table 1—Periodic Maintenance{Maintenance to be carried out by qualified service personnel. Refer to the Installation ManualTable 2—Troubleshooting*Diagnostic lights are a combination of lights that will illuminate in the display area on the unit. They are a combination of the lights you see during normal operation.International Comfort Products, LLCLewisburg, TN 37091。
网址:大金空气净化器使用说明书(中文版) https://www.yuejiaxmz.com/news/view/969934
相关内容
大金空气净化器使用说明豹米空气净化器说明书 空气净化好手 豹米空气净化器霾霸版评测
夏普空气净化器使用说明
空气净化器使用手册
空气净化器说明书
小米空气净化器2s说明书下载 小米空气净化器2s说明书
亚都空气净化器说明书整编
honeywell空气净化器使用说明
空气净化器使用说明书呼吸新鲜空气提升生活品质
米家空气净化器使用说明
随便看看
最新动态分享
- 适合搭配的食材
- 食疗养生大全:67种天然食材搭配与食疗方,吃出健康好气色
- 哪些食材可以搭配食用 十对最佳食材搭配好吃又健康
- 壮阳补肾煲汤大全:中药配方与食材搭配全解析
- 广东鱼肚汤的家常做法大全|营养功效+食材搭配+5种经典汤谱(附详细步骤)
- 四季美容养颜豆浆配方大全|天然食材搭配+科学原理,喝出透亮肌
- 零失败家常小炒菜谱大全(附新手必学技巧+食材搭配指南)
- 补肾食谱大全:10种家常食疗方+食材清单,科学搭配提升肾动力
- 5种营养搭配!家常鸡汤快手做法大全(附不同做法+食材禁忌)
- 麻辣香锅食材菜单大全图
热点动态分享
- 144597
- 47783
- 44624
- 40401
- 40303
- 30623
- 25137
- 25012
- 21607
- 18303